Upgrading to Google Analytics 4 (GA4): A Step-by-Step Guide
Google Analytics 4 (GA4)
As a Google Analytics specialist, you understand the importance of tracking and analyzing website data to make informed decisions. Google Analytics 4 (GA4) is the latest version of this powerful tool, offering enhanced features and capabilities to help you gain valuable insights. If you're considering upgrading to GA4 but unsure how to get started, this step-by-step guide will walk you through the process in an easy-to-understand manner.
Step by Step Guide for setting up GA4
Step 1: Create a New Google Analytics 4 Property:
The first step towards upgrading to GA4 is to create a new property. Log in to your Google Analytics account and navigate to the Admin section. From there, select the appropriate account and click on "Create Property." Choose the "Web" option and enter the required information such as property name, URL, and reporting time zone.
Step 2: Install the GA4 Tracking Code:
Once you've created a new GA4 property, it's time to install the tracking code on your website. Go to the Admin section and select the property you just created. Under the "Data Streams" tab, click on the "+ Add Stream" button and choose "Web" as the data stream type. Provide the necessary details, including the website URL and stream name.
After setting up the data stream, you'll receive a measurement ID, which is a unique identifier for your property. Copy this ID as you'll need it for the next step. Now, install the GA4 tracking code on your website by adding it to the header section of all the pages you wish to track. For some CMS systems, you may need the Google Analytics plugin to do this as an option.
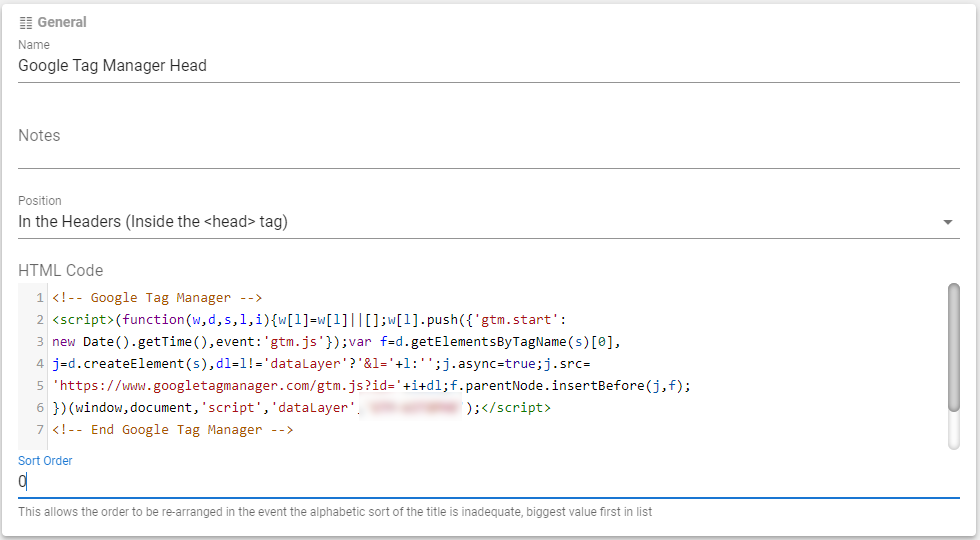
If you're using the Udo content management system (CMS), click on the view tag instructions button and copy and paste the full tracking code provided and then paste into the custom code section of the CMS admin (see image below), this places the tracking code on all pages and content in 1 place, making life easier.

Step 3: Set Up Custom Events and Parameters:
GA4 introduces a new event-based tracking model, allowing you to capture specific actions users take on your website. It's crucial to define custom events and parameters tailored to your business objectives. Think about the key actions you want to track, such as button clicks, form submissions, or video views.
To set up custom events and parameters, navigate to the "Events" section in your GA4 property's configuration. Click on "Manage events" to define events and assign relevant parameters. You can choose from predefined event templates or create custom events using event parameters.
Step 4: Enable Data Collection Enhancements:
GA4 offers various data collection enhancements, such as enhanced measurement and user engagement tracking. These features provide more accurate data and insights into user behavior. In the Admin section, under "Data Streams," select your web data stream and click on "Enhanced measurement." Enable the relevant options based on your tracking needs.
Step 5: Set Up Conversion Tracking:
Conversion tracking is vital for measuring the effectiveness of your marketing efforts. In GA4, you can configure conversion events to track specific actions that lead to desired outcomes, such as purchases, form completions, or newsletter sign-ups. Under the "Events" section, select "Conversions" and click on "+ Create conversion event." Define the conversion event details, including the event name, value, and conditions for triggering the event.
Step 6: Explore GA4 Reports and Insights:
Once you've completed the setup process, give GA4 some time to collect data. After a few hours or days, you can explore the reports and gain insights. GA4 offers a user-centric approach, providing a comprehensive view of user behaviour across devices and platforms.
Utilize the "Explore" section to create custom reports, apply filters, and compare data across different dimensions. The "Analysis" section offers advanced insights and predictive metrics, empowering you to discover trends and opportunities for optimization.
Conclusion:
Upgrading to Google Analytics 4 (GA4) is a smart move for any analytics specialist. By following the steps outlined in this guide, you can seamlessly transition to the enhanced features and capabilities offered by GA4. From creating a new property to installing the tracking code, setting up custom events, and exploring insightful reports, GA4 empowers you to gain valuable data-driven insights and make informed decisions. Upgrade to GA4 today and take your analytics game to the next level!